Thursday, April 25, 2013

Qrazy for Quesadillas!

With Cinco de Mayo right around the corner, what better time to experiment with some Mexican recipes?  Several months ago, knowing how much I enjoy cooking and how excited I get about kitchen gadgets, a dear family friend gave me a quesadilla maker (thanks so much, Nealda! :)  Last night, after getting home from a short run (I donated blood on Tuesday and apparently it takes me a while to bounce back from that, since a 5.6 mile run was literally all I could muster...despite running a solid 12.3 miles on Sunday, but I digress), I decided that it was time to break out the quesadilla maker and concoct something tasty! The result...Black Bean Quesadilla for one!

Black Bean Quesadilla

Ingredients:
  • 2 (10-inch) flour tortillas
  • 1 can black beans (I prefer reduced-sodium)
  • 1/2 cup medium salsa OR 1/2 cup diced tomatoes w/ green chilies
  • 1/2 cup white corn (from frozen, zapped for 2 minutes in the microwave - next time I want to try it with Trader Joe's Fire-Roasted Corn, but I didn't have any on hand last night)
  • 1-2 dashes cayenne pepper (alter to your own spice tolerance)
  • 1/2 tsp. cilantro
  • 3/4 cup reduced-fat Mexican cheese blend, shredded
Before assembling your quesadilla, wipe down the inside of your quesadilla maker with a damp cloth.  Spray both heating plates with cooking spray (I prefer using my Misto® olive oil sprayer).  Close the lid and plug-in the appliance to begin heating up.

Combine black beans, salsa/tomatoes, corn, cayenne pepper, and cilantro in a small bowl.


Lay 1 tortilla on a flat surface and spread filling over it (you will likely have some leftover filling, but don't over-fill or it will leak out during the grilling process).  Sprinkle shredded Mexican blend cheese over top of the filling.  Once the indicator light on the quesadilla maker shows that it is preheated, open the lid and transfer the tortilla with toppings onto the bottom heating plate.  


Top with 2nd tortilla, close lid, and cook for approximately 5 minutes.  When done, transfer the quesadilla to a plate and serve with sour cream, remaining salsa, and avocado/guacamole.


So, I went a little overboard with the salsa, but it was still tasty despite being a bit messy!

And there you have it!  A super simple, yet super tasty weeknight dinner that you can throw together in just a few minutes!  Ole! :)


Sunday, March 31, 2013

Caramel Carrot Cake White Chocolate Cheesecake Trifle (a mouthful to say, but oh-so totally worth it!)

Happy Easter, everyone!!!  I hope you all had a wonderfully blessed and happy one!

Last weekend, after a fun day in the Valley including lunch at Dave's Taverna, winetasting and a winery tour at CrossKeys Vineyard, and the Green Valley Book Fair with the b/f and our (newly engaged!) friends Patrick and Lila, I enjoyed a nice dinner with Mom and Jon at L'Italia.  It was an awesome, fun-filled Saturday, and at some point during conversation that night, I asked Mom what she wanted me to make for Easter dinner the next Sunday.  She thought about it and suggested that I could make a dessert, like carrot cake.  Now, I've made a couple of pretty awesome carrot cakes from scratch for various occasions in recent years, but this time I just felt like changing it up a bit.  So, I started searching for something carrot cake-ish, but a bit different from the norm.  Then, I happily stumbled upon this recipe for Caramel Carrot Cake White Chocolate Cheesecake Trifle from Something Swanky, and I knew I absolutely had to make this delectable dessert!  Game over!!!

I also volunteered to bring a dessert for a Young Professionals Ministry party last Tuesday night, so I figured I might as well go ahead and test out the new recipe!  It turned out to be a huge hit, with only about 1.5 servings left in the bottom of the bowl! :)  I took this as a good sign that the trifle was indeed worthy of being served at Easter dinner.  So alas, I whipped it up again yesterday afternoon and received rave reviews from my fam. :)

Caramel Carrot Cake White Chocolate Cheesecake Trifle

Ingredients:


  • 1 - 9x13 carrot cake (baked & cooled), from scratch or from a mix...(if you go the mix route, I highly recommend Duncan Hines Decadent Classic Carrot Cake mix)
  • Caramel Sundae Sauce
  • 2 cups pecan pieces, chopped (optional...I left these out)
  • 1 - 8 oz. tub Fat-Free Cool Whip, thawed
  • 1 - 8 oz. container Philadelphia White Chocolate Indulgences cream cheese, softened*
  • 1 - 8 oz. container Neufchatel cream cheese, softened*
  • 1/3 cup sugar
  • 1/2 tsp. salt
  • 1 tbsp. lemon juice
  • 2 tsp. vanilla extract
*The original recipe called for 2 containers of the white chocolate cream cheese, but I thought that would be a bit too rich, so I decided to go with 1 white chocolate and 1 neufchatel, which I think worked out well.

Instructions:

1. Using a hand mixer, blend the cream cheese and sugar together until smooth and creamy.
2. Blend in the cool whip, salt, lemon juice, and vanilla. Set mixture aside.
3. Once the carrot cake is completely cooled, cut the cake into 1″ squares. Place 1/3 of the squares in the bottom of a trifle dish. 


4. Drizzle caramel over the cake (feel free to adjust the amount based on your own personal preference).


5. Spread 1/3 of the cheesecake mixture over the cake and sprinkle with 1/3 of the pecans (if using).


6. Repeat layering, ending with the cheesecake and pecans (if desired) on top. 


Drizzle with some more caramel! Chill for at least an hour or overnight, serve, and be prepared to scrape the bowl clean! :)


Saturday, March 30, 2013

Shrimp & Veggie Curry Fried Rice

It's no secret that I'm a huge fan of ethnic food, especially Indian and Thai....oh, and Ethiopian!  However, I tend to shy away from cooking many of these dishes at home, as it usually seems that my attempts to recreate some of my favorite Indian and Thai dishes turn out just mediocre instead of mouthwatering.  For some reason though, recently I was in the mood to give it another shot.  Thus, I bring you...

Shrimp & Veggie Curry Fried Rice

The first rule of making fried rice: Be sure to use leftover, day-old rice that has been stored in the refrigerator.  Freshly cooked rice will turn out mushy, and nobody wants mushy fried rice, right? :P

Ingredients:

  • 5 cups cooked, day-old jasmine rice
  • 1 medium onion, finely chopped
  • 1 green chile, chopped & seeds removed
  • 3/4 cup frozen green peas, thawed
  • 1/3 cup carrots, diced
  • 1 medium red bell pepper
  • 3/4 cup mushrooms, chopped
  • 2 tbsp. Thai Red Curry Paste
  • 1 tbsp. Spicy Thai Chili Sauce
  • 1 1/2 tsp. curry powder
  • 1/8 tsp. ginger
  • 2 tsp. minced garlic
  • 1 lb. raw shrimp, shelled & de-veined
  • 1/2 cup egg substitute, black pepper added
  • 2 tsp. reduced-sodium soy sauce
  • 1/2 tsp. cilantro
  • Vegetable oil

Heat wok over medium heat. Once the wok is hot, add oil and heat for several seconds.  Add onions and chilies and stir-fry until soft.


Once the onions and chilies are tender, add all of the other vegetables that you're using.  Cook until veggies are almost tender, then remove veggie mixture from wok into a bowl and set aside.


Add red curry paste, spicy thai chili sauce, curry powder, ginger and garlic to the wok.  Add shrimp and cook until they turn pink.


Add rice and toss thoroughly until coated with curry mixture.  Spread the rice all over the surface area of the wok and let it heat up.  Don't stir until you hear the rice grains sizzle.  Toss rice, moving it around the wok and again spreading it out.  Drizzle soy sauce over rice and toss again.  Return veggies to wok and mix in with rice and shrimp.


Meanwhile, cook eggs in small frying pan, stirring as if you are making scrambled eggs, until they just start to set.  Add to rice mixture and continue cooking until everything is heated through.  Remove wok from heat, stir in cilantro, and serve immediately.


Enjoy!


Monday, February 25, 2013

Weeknight Tuna Noodle Casserole...with a bit of a kick! :)

For some reason, I've really been in the mood to bake casseroles recently...not sure why, but hey, I don't question these things, I just go with them! :)  So, tonight after work I went for a 5 mile run, then came home and thew together a Tuna Noodle Casserole.  After perusing several recipes, I decided to take elements from all of them, while also tweaking it to my personal preferences...aka adding a few ingredients like cayenne pepper and red pepper flakes. :)

Below is the result of my latest culinary experiment, which I must admit, made for a pretty tasty dinner...even despite the fact that it wasn't actually ready until 9 p.m...but hey, all good things are worth waiting for, right?

Weeknight Tuna Noodle Casserole with a Kick!

Ingredients:

  • 8 oz. Ronzoni Healthy Harvest Whole Grain egg noodles (from 12 oz. bag)
  • 1 can Campbell's Healthy Request Cream of Celery soup
  • 1/2 cup low-fat mayo (or mayo substitute)
  • 1 (4 oz) can mushroom stems & pieces, drained
  • 2 ribs celery, finely chopped
  • 1/2 cup sweet peas (frozen or canned)
  • 1 cup fat-free evaporated milk (or fat-free half & half)
  • 2 cups shredded reduced-fat sharp cheddar cheese
  • Several dashes grated Parmesan cheese
  • 2 (5 oz) cans tuna (packed in water), drained
  • 1 tsp. freshly ground black pepper
  • 1/2 tsp dry mustard
  • 1/8 tsp. red pepper flakes
  • 1/8 tsp. cayenne pepper, plus more for top
  • 1/2 cup shredded reduced-fat mexican blend cheese
  • 1/4 cup Italian breadcrumbs
  • Several dashes Butter Buds
Cook noodles in salted water until al dente. Set aside.

Preheat oven to 325°.  Grease 9x13 casserole dish with cooking spray.

Mix all ingredients (except mexican cheese, breadcrumbs, Butter Buds, and reserved cayenne pepper) together in large mixing bowl, adding cooked noodles last.  


Transfer tuna noodle mixture to the prepared casserole dish.  Sprinkle 1/2 cup mexican blend shredded cheese over casserole, followed by the breadcrumbs, cayenne pepper, and Butter Buds.

Bake in preheated oven for 25-35 minutes, or until bubbly and lightly browned.


Of course, if you have an aversion to spicy stuff, you can omit the cayenne pepper, but I personally think it is the perfect added touch!


Hope y'all enjoy! :)


Saturday, February 16, 2013

Amici Ristorante...An Italian Delight in Carytown!

For Valentine's Day, the b/f took me out for a lovely dinner at Amici Ristorante, a Carytown restaurant that specializes in Northern Italian cuisine.  I have walked or driven past this establishment dozens of times over the past (nearly) 3 years of living in the Fan, and despite the fact that it has been on my "Jules' Richmond Restaurants To Try" list for almost as long as I've lived here, it was one of those special occasion places that I just hadn't made it to yet.  So, on Thursday evening when Michael told me where we were going for dinner, I was pretty ecstatic to finally try it out!

When we arrived, we were greeted by several of the friendly staff.  Once they confirmed our reservation, we were led upstairs (we didn't even realize the restaurant had a 2nd level!), and were given our choice between the only two vacant 2-person tables.  One of them just so happened to be in the back corner, so we snatched that one up, as it offered a bit more privacy.  Since I rate restaurants based on ambiance as well as quality of food, I immediately appreciated the pleasantly romantic atmosphere of the Amici dining room.  Pale yellow walls adorned with eye-pleasing framed prints and attractive decor, dimmed lighting, white tablecloths, and a relatively low noise level conducive to intimate conversation collectively set the mood for a romantic dining experience.

The only thing that I felt was missing was a candle on each table...I mean the ambient lighting was nice in itself, but dinner by candlelight on Valentine's Day just seems appropriate.  I've been to far less classy joints that at least have a votive candle on the table.  Totally being knit-picky though.  Oh, and the other minor thing that struck me as a bit odd was the music...the playlist/radio station played an interesting mix of tunes that ranged from current country music to 90's alternative rock, the latter of which is one of my favorite genres, but it just felt a bit out of place in this particular environment.  Seems to me like some Frank Sinatra and Dean Martin standards would be a much better complement to the overall vibe of the place, but maybe that's just me being cliche.  Haha.

Okay, moving on to the most important factor when it comes to rating a restaurant: the FOOD!  We started by perusing the wine list and decided on a Riesling for me (sweetest white I could find on the menu haha) and a red that I don't remember for him (but I'm sure it was the driest red on the menu...our tastes in wine are on complete opposite sides of the spectrum lol).  We both found our respective glasses of wine to be very enjoyable, so that got our meal off to a great start.  Anyway, on to the dinner menu...In my typical indecisive fashion, I waffled back and forth between several menu items and changed my mind at least 3 times before finally settling on the "spaghettini al nero con trota affumicata."  Translation: homemade black ink spaghettini with smoked trout, arugula, and cream sauce.  I was intrigued by the uniqueness of this dish, which is part of the reason I decided to order it...I'm always a fan of trying new, unique things!  However, I don't think I had ever eaten trout before ordering this dish, so I was a bit nervous about how "fishy" or salty it might taste.  Imagine my excitement when this delightful dish was placed in front of me...

Black ink spaghettini w/ trout, arugula, & cream sauce...just wow!
The first bite removed any skepticism I might have had about whether I ordered the right thing or not....omg...this was so incredibly delish!  I savored every bite, but as much as I wanted to devour the whole thing, it was too much to finish in one sitting (plus, I needed to save room for my homemade cheesecake that we were having for dessert ;), so I enjoyed the leftovers for lunch on Friday.  Michael sampled my pasta dish and agreed that it was fantastic.  He ordered the ribeye, which came with potatoes and asparagus...I obviously didn't sample his entree, but he said that it was awesome, and his clean plate supported that statement. :)

So, Amici Ristorante earns high marks from me for an overall wonderful Valentine's Day dining experience.  It's definitely worthy of a spot on my list of fave special occasion dining spots, which means I will most certainly be back!  The next time you find yourself looking for a quality date night spot in RVA, you should definitely give Amici a try! :)

And since this post is about my Valentine's Day dinner, I can't help but share a pic of the beautiful bright pink roses (my fave flower) that the b/f surprised me with. :)


Friday, February 15, 2013

NY Style Cheesecake for an RVA Style Valentine's Day

Happy Valentine's Day one day late, y'all! :)

Based on the title of this post, you probably already guessed that a cheesecake recipe will follow...and of course, you are correct.  However, I want to preface the recipe with the backstory for why I made it.

As many of you know, I really enjoy baking (way to state the obvious, huh? lol), and I especially love sharing those baked goodies with my family and friends.  However, my boyfriend doesn't really care for desserts.  I know, I know...crazy, right?  But then again, most people think I'm weird for being a vegetarian, so I have no room to judge.  Haha.  Besides, he still indulges my Sweet Frog obsession despite the fact that he doesn't really care for fro-yo, so he wins brownie points there (except he wouldn't really enjoy eating them after he won them...Sorry, that was a terrible joke, but I couldn't resist :P)  Anyway, the one dessert that he does actually enjoy is cheesecake, so I decided several weeks ago that I would bake him a cheesecake for Valentine's Day.  In those rare instances (like once a year) when I decide to put forth the time and effort to bake a cheesecake in my tiny kitchenette, I usually like to experiment by making a different flavor each time (i.e. pumpkin, white chocolate, Bailey's, caramel apple, cranberry orange, etc).  So, one night earlier this week, the b/f was reading and I was sitting on the couch next to him perusing foodgawker (aka my fave recipe site), just looking for any recipes that particularly jumped out at me as being pin-worthy.  He glanced over my shoulder at one point and an appetizing photo of a cheesecake slice apparently caught his eye as he gushed "Mmmm cheesecake."  So here was my opportunity to nonchalantly figure out what kind of cheesecake he would prefer.  "Haha yup!  So what's your favorite kind of cheesecake?" His response: "Just plain cheesecake...."  My response: "Oh..."  To which he added: "I mean, sometimes I like it with fruit topping, like cherries...or whipped cream."  Hmm okay, I decided to keep digging.  "Well, have you ever had coffee or Kahlua cheesecake?  I thought you'd like that since you love coffee so much."  His response: "I'd rather just drink coffee with my cheesecake."  Well, so much for my game plan to make a creative cheesecake.  Haha.  But hey, it was part of his Valentine's gift, so I wanted to make what he would enjoy most...NY Style Cheesecake it is!

Admittedly, when I first taught myself to make cheesecake in college, I was one of those health food nuts who attempted to make everything as low in fat and calories as possible...yes, even desserts.  You can probably guess where this is going....the first cheesecake I made contained part fat-free and part neufchâtel cream cheese. Dessert failure right there, folks.  LOL.  If you've ever attempted to do this, you now also realize that fat-free cream cheese doesn't actually get creamy when beaten, it gets clumpy.  So, the end result was a lumpy cheesecake that was...edible at best, but definitely lacked the rich, creamy texture that makes cheesecake so decadent.  But hey, some of life's best lessons are learned by trial and error, right? :)  Anyway, after that experience, I learned that attempting to make cheesecake less terrible for you totally defeats the purpose...desserts are supposed to be enjoyed in moderation, so when you do, you might as well make them splurge-worthy! :)

Anyway, enough rambling and on to the cheesecake recipe!  When I think of "authentic" New York style cheesecake, Junior's and Carnegie Deli are the first names that come to mind.  I wasn't actually expecting to find either of those recipes posted online, however, I figured it was worth a quick Google search, and surprisingly, I found this recipe for Junior's Original New York Cheesecake.  Whether it's actually the real thing, I can't say, however it turned out pretty delightful, so it's a keeper in my book!

Ingredients:

Crust: (The original recipe calls for Junior's Sponge Cake Crust, however, I changed this up because I'm a fan of graham cracker/vanilla wafer crust).
  • 1 cup graham cracker crumbs
  • 2/3 cup vanilla wafer crumbs
  • 2.5 tbsp butter or margarine, melted
Cheesecake Filling:
  • Four (8 oz.) packages cream cheese, softened to room temperature
  • 1 2/3 cups sugar
  • 1/4 cup cornstarch
  • 1 tbsp. vanilla extract
  • 2 extra-large eggs (or 1/2 cup egg substitute, which is what I used)
  • 3/4 cup heavy whipping cream 

Preheat the oven to 350°F. Generously spray the bottom and sides of a 9-inch springform pan with Pam For Baking (or any other cooking spray).  Wrap the outside of the pan with aluminum foil, covering the bottom and extending all the way up the sides.  Process graham crackers and vanilla wafers in a food processor until ground into fine crumbs.


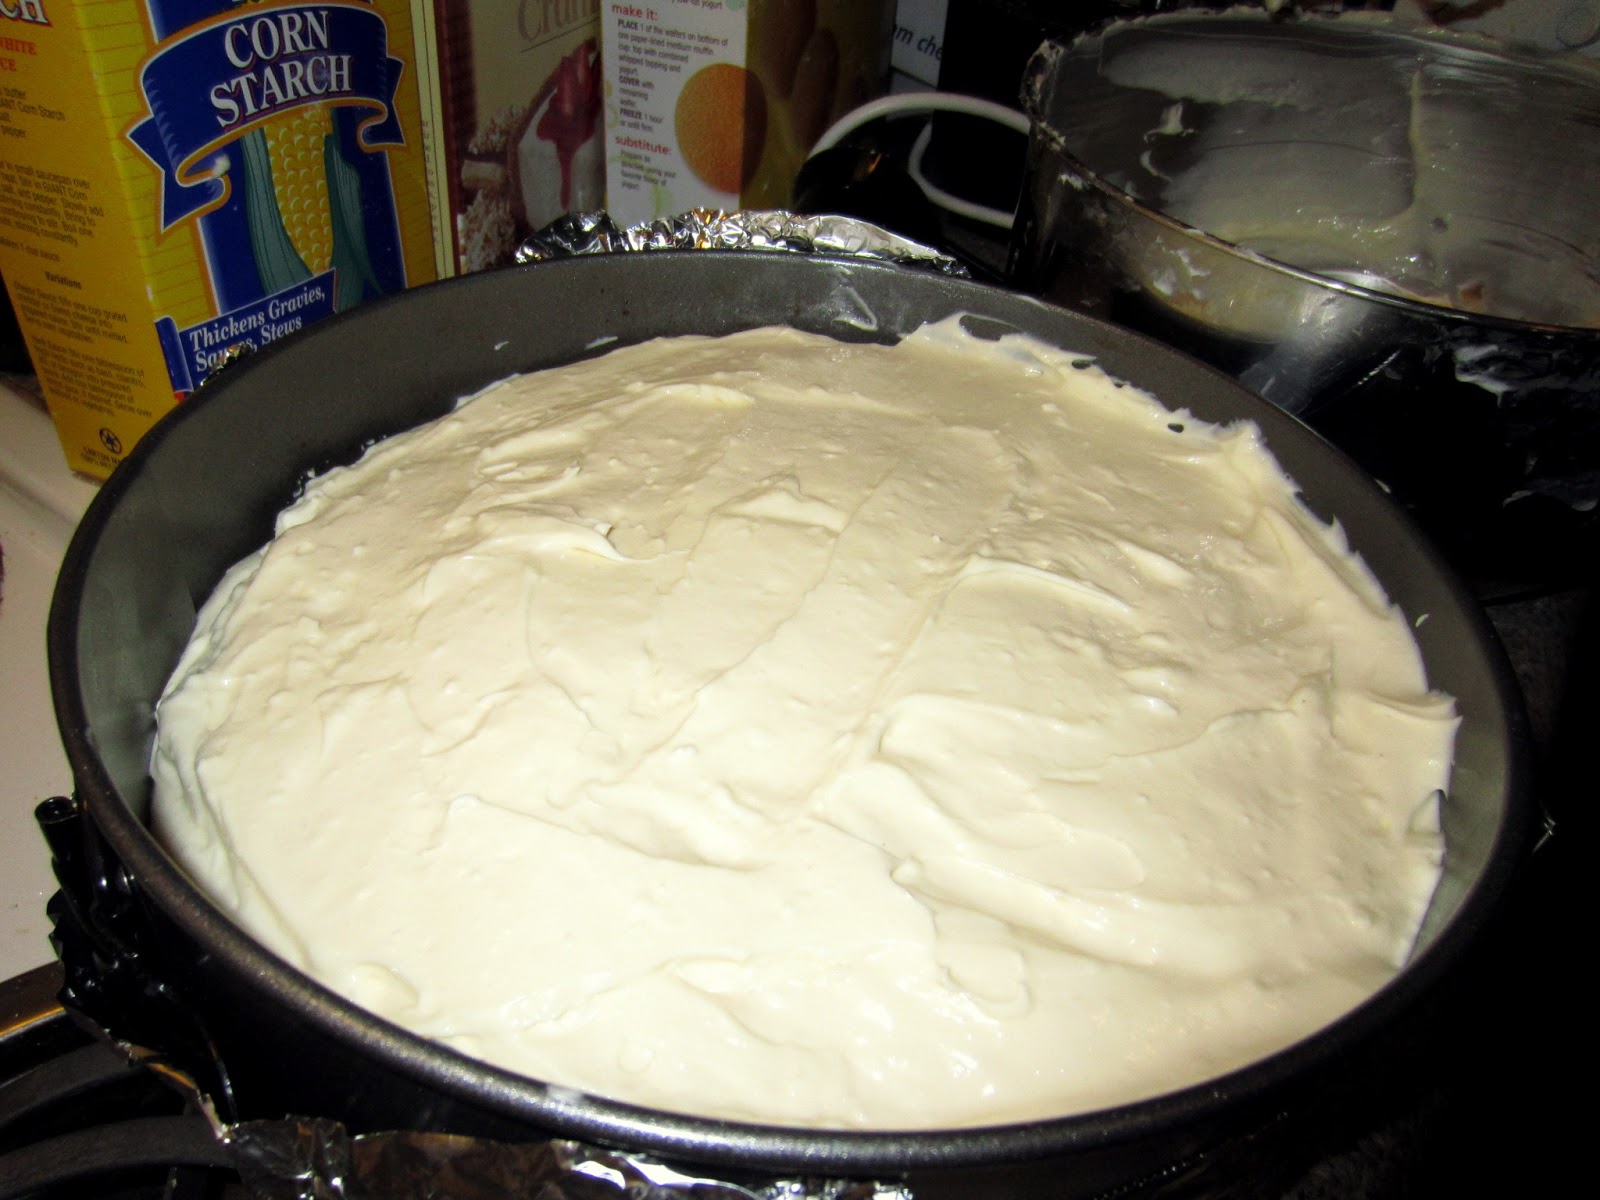
Pour crumbs into the greased springform pan. Pour in melted butter, blend, then pat the crumb/butter mixture on the bottom of the pan to form the crust. Bake in the preheated oven for 10 minutes. Remove to cool.


Combine one package cream cheese, 1/3 cup sugar, and the cornstarch in a large bowl and beat with an electric mixer on low until creamy, about 3 minutes, scraping down the bowl several times. Blend in the remaining cream cheese, one package at a time, scraping down the bowl after each one. 


Increase the mixer speed to medium and beat in the remaining 1 1/3 cups sugar, then the vanilla. Blend in the eggs, one at a time, beating well after adding each one. Beat in the cream just until completely blended and smooth. Be careful not to overmix! 


Gently spoon the batter over the crust. 


Place the cake in a large shallow pan containing hot water that comes about 1 inch up the sides of the springform.


Bake until the edges are light golden brown and the top is slightly golden tan, about 1 1/4 hours. Remove the cheesecake from the water bath, transfer to a wire rack, and let cool for 2 hours (just walk away - don't move it). Then, leave the cake in the pan, cover loosely with plastic wrap, and refrigerate until completely cold, preferably overnight or for at least 4 hours.
To serve, release and remove the sides of the springform, leaving the cake on the bottom of the pan. Place on a cake plate and top with fruit topping or whipped cream, if desired.


Refrigerate overnight or until ready to serve (at least 4 hours).  Slice the chilled cheesecake with a sharp straight-edge knife.


After a lovely Valentine's Day dinner at Amici Ristorante (more on that in my next post ;), we came back to my apartment and each enjoyed a slice of this cheesecake with coffee.  I should note that I sent the leftover 8/10 of the cheesecake home with him...didn't need that kind of temptation in my fridge!  Haha.

Hope you all have a fabulous weekend! :)

Monday, February 4, 2013

Fake Chocolate Chip Cookie Dough Dip & Spicy Maryland Crab Dip Recipes :)

Several weeks ago, I started perusing recipes in preparation for a Super Bowl Party hosted by one of my dearest friends and her husband.  I'm always so indecisive when it comes to choosing what to make for parties/events...heck, I'm the same way even when it comes down to what to make for dinner!  Haha.  Anyway, I knew I wanted to make something Maryland-ish in honor of the Ravens (of course the Redskins are my team, but Baltimore is also close by, and the Ravens are purple, so my Super Bowl allegiance this year was a no brainer ;), and also something dessert-y, since sweet stuff tends to be my specialty and many of my friends have come to expect me to bring baked goods or other sweet treats to any gatherings that we have.

For the sweet treat, I considered making my special Kahlua brownies, or Oreo truffles, or cupcakes...okay, so I was having trouble narrowing it down, but then I came across this recipe for Chocolate Chip Cookie Dough Dip.  Super simple to make, and yet oh-so-delicious!  This "fake" cookie dough dip turned out to be a big hit with my fellow partygoers, so I think it's a keeper! :)


Fake Chocolate Chip Cookie Dough Dip

Ingredients:

  • 1/2 cup (1 stick) butter
  • 1/3 cup brown sugar (packed)
  • 1 tsp. vanilla
  • 1 (8 oz.) package neufchâtel (1/3 less fat) cream cheese
  • 1/2 confectioner's sugar
  • 3/4 cup mini chocolate chips
Directions:

Place the stick of butter and the brown sugar in a microwave-safe dish. Heat in 30 second intervals, stirring between each, until the butter is completely melted.  Remove from microwave and stir until sugar dissolves.  Whisk in vanilla, then set mixture aside to cool.  In a medium bowl, beat cream cheese and confectioner's sugar together for 1 minute.  Slowly beat in cooled butter mixture and continue beating for another minute.  Stir in the mini chocolate chips.  Pour into a serving bowl and refrigerate until ready to serve.

Serve with graham crackers and/or vanilla wafers.

~~~~~~~~~~~~~~~~~~~~~~~~~~~~~~~~~~~~~~

As for the Maryland-ish dish, I decided to make a Spicy Maryland Crap Dip, which I adapted from this recipe.  This was also quite popular and I will definitely be making it again soon!  Since I altered the linked recipe quite a bit, I have posted my version below.

Spicy Maryland Crab Dip

Ingredients:
  • 1 (8 oz.) container neufchâtel (light) cream cheese, softened
  • 1/2 cup light sour cream
  • 2 heaping tablespoons light mayo
  • 1 tbsp. lemon juice
  • 2 tsps. Worcestershire sauce
  • 1 tsp. dry mustard
  • 1 tsp. garlic powder
  • 2 tsps. grated parmesan cheese
  • 1 1/2 cups shredded sharp cheddar cheese
  • 3/4 pound fresh crabmeat or 2 cans crabmeat, drained & flaked
  • 5 dashes tabasco sauce
  • 1 dash Emeril's Essence seasoning
  • 1 1/2 tbsps. Old Bay seasoning
Directions:

Pre-heat oven to 325°F.  Lightly grease an 8x8 baking dish with cooking spray.  In a medium bowl, mix cream cheese, sour cream, mayo, lemon juice, Worcestershire sauce, mustard, garlic powder, 1 tsp. parmesan cheese, and 1 cup of sharp cheddar cheese.  Fold in crabmeat, tabasco sauce, Emeril's Essence, and 1 1/4 tbsps Old Bay.


Transfer mixture into greased baking dish.  Top with remaining parmesan and cheddar cheeses and Old Bay.


Bake for 30 minutes, or until bubbly and lightly browned.  Serve with crusty bread, crackers, pita or tortilla chips.


~~~~~~~~~~~~~~~~~~~~~~~~~~~~~~~~~~~~~

Hope you all enjoyed the Super Bowl as much as I did! :)  What are your favorite gameday recipes?